Palworld vs Pokemon vs Aniimo: Differences Explained
How Palworld actually differs from Pokemon and Aniimo: nine elements instead of a sprawling type chart, ten sphere tiers you aim by hand, no evolution at all, 41,616 breeding combos, 12 work suitabilities that staff a factory, and 145 weapons you fire yourself.
All three games hand you a ball, a creature index and a list of elements, which is why people keep lumping them together — but what you do in the hours *between* catches is completely different in each. Here's the honest breakdown: what transfers if you're coming from Pokemon or Aniimo, what will get you killed, and the exact Palworld systems that have no equivalent in either.
Palworld vs Pokemon vs Aniimo at a Glance
Read the table as three answers to one question: what is a creature *for*? In Pokemon it's a battler, in Aniimo it's a body you step into, and in Palworld it's labour — a Pal that can't fight at all can still be the most valuable thing in your save because it runs a furnace while you're asleep. The rows below where Palworld says "none" are the ones worth paying attention to, because those are the habits you'll waste time looking for.
| Palworld | Pokemon RPGs | Aniimo | |
|---|---|---|---|
| Creature | Pal — 288 in the Paldeck, 204 numbered entries plus 84 variants | Pokemon | Aniimo |
| Capture device | Pal Sphere — 10 tiers you craft yourself | Poke Ball | Aniipod |
| Index | Paldeck | Pokedex | Aniilog |
| Combat | Real-time. You carry a gun and fight beside your Pal | Turn-based in the mainline RPGs; real-time commands in Legends: Z-A | Real-time, with Command Mode and Twine Mode |
| Direct control | You ride mounts and trigger Partner Skills — you never *become* the Pal | The Indigo Disk's Synchro Machine, as a side feature | Twining, and it's the core of the game |
| Evolution | None. No species turns into another species | Evolution lines with per-species conditions | Evolution routes, some of them branching |
| Creature jobs | 12 work suitabilities, assignable at a base | None | Homeland farming and production |
| Element count | 9 | A much wider chart | Elemental matchups, Aniimo's own set |
| Your character | A survivor who levels, crafts, eats and freezes to death | A trainer | A Pathfinder |
| The real hook | Building a base that runs itself | Refining a battle team | Playing the world through a creature's body |
What Carries Over From Pokemon (and What Doesn't)
The transferable instinct is the good one: read a creature's element, check what it's weak to, and don't judge it by its art. That gets you a long way. What does *not* transfer is the assumption that the fight is a menu — Palworld resolves everything in real time, so your positioning, your ammo count and your own armour tier are all part of the encounter. Losing a fight here often has nothing to do with which Pal you brought.
| Pokemon habit | In Palworld? | What actually happens |
|---|---|---|
| Check the type matchup first | Yes, fully | 9 elements, ~1.5× damage on a hit against a weakness, and the same 1.5× coming back at you — see the Palworld type chart and counters |
| Weaken it, then throw | Yes, and more so | Remaining HP swings capture odds by roughly 9× from full to near-dead. Nothing else you can do matters as much |
| Pick moves from a menu | No | Your Pal uses its own skills on cooldown while you shoot. There is no turn to wait for |
| Grind levels to evolve it | No | Nothing evolves. A stronger version of a species is a *different* species you breed or catch |
| Keep one of each, release duplicates | No — keep them | Duplicates get condensed for permanent stat ranks, or assigned to a base job. A second Mozzarina is a second milk supply |
| Ignore the ones that can't battle | Definitely not | Chikipi lays eggs and Kelpsea makes Pal Fluids. Neither will ever win a fight and both are worth catching |
| Heal at a centre between fights | No | You cook food, craft medicine and build a Pal Bed. Injured Pals need a Palbox and time |
Elements: Only Nine, and the Chart Is Short
Nine elements, and the whole chart fits in one screen — which is genuinely easier to hold in your head than what Pokemon veterans are used to. Every element has exactly one weakness except Water, which eats extra damage from both Electric and Grass. The two elements that attack twice are Fire (Ice and Grass) and Grass (Ground and Water), so a Fire team covers an unusually wide slice of the map. Dark is the biggest roster at 70 Pals and its only counter is Dragon, of which there are just 25 — that scarcity is exactly why late-game Dark bosses feel like a wall.
| Element | Strong against | Weak to | Pals |
|---|---|---|---|
| Dark | Neutral | Dragon | 70 |
| Water | Fire | Electric, Grass | 47 |
| Grass | Ground, Water | Fire | 46 |
| Ground | Electric | Grass | 44 |
| Fire | Ice, Grass | Water | 43 |
| Ice | Dragon | Fire | 38 |
| Neutral | — | Dark | 36 |
| Electric | Water | Ground | 25 |
| Dragon | Dark | Ice | 25 |
One thing that has no Pokemon analogue: a Pal's element and its *damage* element are separate. The move decides the damage type, so a Neutral Pal carrying a Fire skill hits Ice weaknesses perfectly well, and 87 Pals carry two elements at once. That makes coverage a loadout problem rather than a roster problem — the full picture is in the dual-element breakdown and the super-effective rules.
 Catching: Ten Sphere Tiers and You Have to Aim
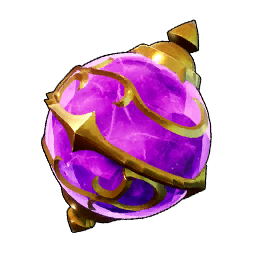
A Pal Sphere is thrown by hand, in real time, at a moving target — there is no encounter screen to pause inside. Spheres come in ten tiers and you craft them at a workbench from Paldium Fragments, so the ball itself is a production problem, not a shop purchase. Capture power is the number that matters, and the early jumps are the steep ones: going from the basic Pal Sphere to a Mega Sphere doubles it, while the climb from Legendary to Ultimate is a fraction of that.
| Sphere | Capture power | Shop price | When it stops being enough |
|---|---|---|---|
 Pal Sphere Pal Sphere | 7 | 80 | Almost immediately — it's for the starting plateau only |
 Mega Sphere Mega Sphere | 14 | 460 | Around the first tower boss |
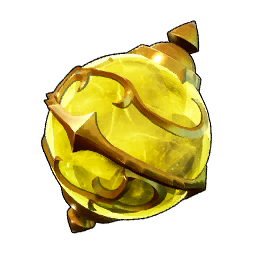 Giga Sphere Giga Sphere | 20 | 890 | Once you're catching in the desert |
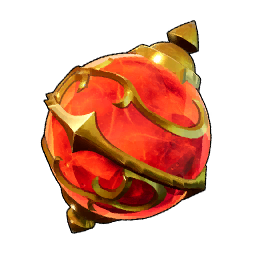 Hyper Sphere Hyper Sphere | 26 | 1,350 | Mid-40s Pals start escaping regularly |
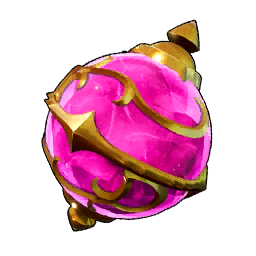 Ultra Sphere Ultra Sphere | 32 | 3,300 | The workhorse tier for most of the mid game |
| Legendary Sphere | 37 | 5,570 | Fine for everything except alphas at full health |
 Ultimate Sphere Ultimate Sphere | 43 | 12,560 | Top of the standard line |
Three more sit above that line — the Exotic Sphere, the Sol Sphere and the Ancient Sphere, the last of which needs World Tree materials and sells for 122,760 — plus the Radar Sphere, which tries to steal a Pal that already belongs to another player. Then there are the six sphere modules you bolt on for extra range, homing or spin, and three launchers that fire spheres like ordnance. Pocketpair has never published the exact capture formula, so treat the odds as close estimates and run your own setup through the capture rate calculator.
No Evolution: Breeding Replaces It Entirely
This is the single biggest thing Pokemon players get wrong here. Nothing in Palworld evolves — not at a level, not with an item, not ever. Similar-looking Pals are not a family line, and elemental variants like Mossanda Lux are not "the evolved Mossanda"; they're separate species with their own Paldeck slots. Progression instead runs through breeding, and the numbers are enormous: 41,616 valid parent pairings, which resolve by an internal combi rank into whichever species sits closest to the parents' average. That's why a random pair usually hands you something unrelated to either parent.
Layered on top are 257 exclusive combos that ignore the averaging rule completely — specific pairs that always produce one specific offspring, and the only way to get most variants without hunting them in the wild. A handful of the useful ones:







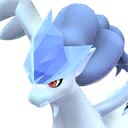
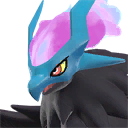
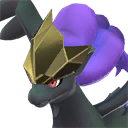

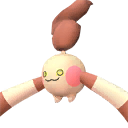

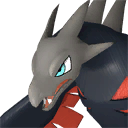

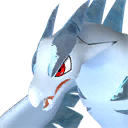
The other half of breeding has no Pokemon equivalent at all: offspring inherit passive skills from both parents, so a bred Pal is how you assemble a four-passive stat monster rather than hoping the wild rolls one. That's the real endgame loop — see How Breeding Works: Combi Ranks, Unique Combos, and Inheritance and the full list of exclusive combos, or just plug two parents into the Palworld breeding calculator.
The Real Difference: Your Pals Work a Factory
Aniimo's Homeland is the closest comparison of the three, and the mainline Pokemon games have nothing like this. Every Pal carries up to 12 work suitabilities rated by level, and assigning one to a base makes it mine, smelt, water crops, chill a fridge or haul goods on its own while you're elsewhere. The spread below is the reason you catch things you'll never fight: Transporting shows up on 140 Pals so haulers are never scarce, but Generating Electricity exists on only 25, which is precisely the bottleneck that stalls most first bases.
| Work | Pals that can do it | Highest rank | Best worker |
|---|---|---|---|
| Transporting | 140 | Lv. 7 |  Knocklem Ignis Knocklem Ignis |
| Handiwork | 109 | Lv. 8 |  Solenne Solenne |
| Gathering | 109 | Lv. 8 |  Jetragon Jetragon |
| Lumbering | 63 | Lv. 8 | 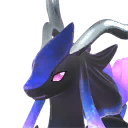 Celesdir Noct Celesdir Noct |
| Mining | 57 | Lv. 8 |  Aegidron Aegidron |
| Watering | 46 | Lv. 8 |  Shaolong Shaolong |
| Planting | 45 | Lv. 8 | 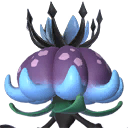 Dandilord Dandilord |
| Kindling | 44 | Lv. 8 |  Renjishi Renjishi |
| Medicine Production | 43 | Lv. 8 | 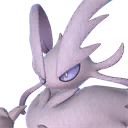 Silvance Silvance |
| Cooling | 38 | Lv. 8 | 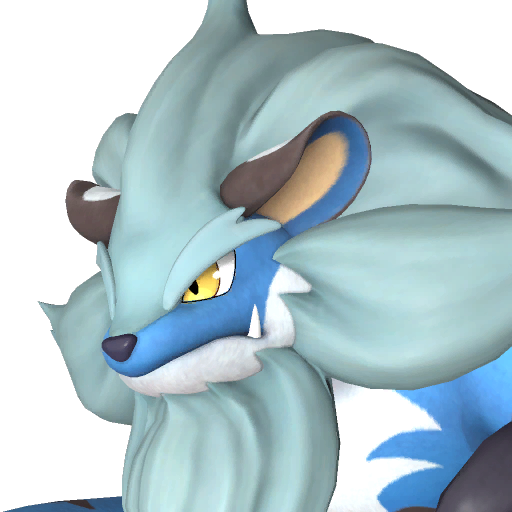 Bastigor Bastigor |
| Farming | 29 | Lv. 4 |  Sibelyx Primo Sibelyx Primo |
| Generating Electricity | 25 | Lv. 8 | 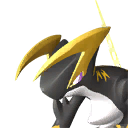 Orserk Orserk |
Note that Farming tops out at Lv. 4 while ten other jobs reach Lv. 8 — nobody is a farming specialist, so you solve crop output with more Pals and more plots instead of one perfect worker. Around that workforce you build from 485 structures, of which 45 are production machines, 23 are Pal facilities like ranches and beds, and 17 are defences for when raiders show up. Twenty-nine Pals also generate items passively from a ranch, from eggs to wool to ingots. The work optimizer will tell you which of your caught Pals to assign where.
 You Fight Too: 145 Weapons, and 11 Pals That Carry One
There is no version of a Pokemon battle where the trainer shoots. In Palworld your character is a combatant with 145 weapons across ten classes — nine of which you can build yourself, the lone sniper rifle being loot only — and your own gear tier is frequently the reason a fight goes badly. One caveat that matters everywhere: attack values only compare *inside* a class. A bow's attack figure and a rifle's are on different scales entirely, so the 20,000 on the Mechanical Bow does not mean it out-damages the 1,860 Plasma Rifle.
| Class | Craftable | First unlock | Ceiling |
|---|---|---|---|
| Melee | 27 | Tech 1 — Hand-Held Torch | Laser Sword at Tech 73 |
| Bow | 4 | Tech 3 — Old Bow | Mechanical Bow at Tech 67 |
| Crossbow | 1 | Tech 13 — Crossbow | Only the one |
| Assault Rifle | 13 | Tech 21 — Musket | Plasma Rifle at Tech 78 |
| Handgun | 11 | Tech 24 — Makeshift Handgun | Specialist tools like the Megaboost Gun at Tech 63 |
| Throwables | 11 | Tech 25 — Frag Grenade | Frag Grenade Mk2 at Tech 53 |
| Rocket Launcher | 10 | Tech 26 — Single-Shot Sphere Launcher | Beam Launcher at Tech 80 |
| Shotgun | 8 | Tech 30 — Makeshift Shotgun | Prototype Shotgun at Tech 69 |
| Gatling Gun | 2 | Tech 54 — Gatling Gun | Laser Gatling Gun at Tech 59 |
Within the assault rifle class the progression is a clean line you can plan around — the Tech 21 Musket sits at 1,000 attack and the Tech 78 Plasma Rifle at 1,860 — and the technology tree gates all of it behind levels and Technology Points. The detail that best captures how far this is from Pokemon: 11 saddles are themselves weapons. Mount Grizzbolt at Tech 40 and you are riding an electric panda that fires a minigun; Jetragon's saddle at Tech 79 is a missile launcher. Rankings are in the guns tier list and the full spec sheet is on the weapons list.
Riding and Partner Skills vs Twining
Palworld's version of using a creature's body is riding it, and it's a traversal system rather than a possession system — you stay yourself, gun included. 140 Pals accept a saddle, and 115 of those have a ride speed worth ranking: 77 ground, 29 flying, and nine water. Flying is the tier that reshapes the game, because the map stops having walls the moment you own a decent aerial mount.
| Type | Ranked mounts | Fastest in the type | Sprint | Runner-up | Sprint |
|---|---|---|---|---|---|
| Flying | 29 | Jetragon | 3,300 |  Panthalus Panthalus | 3,000 |
| Ground | 77 |  Hartalis Hartalis | 1,900 |  Necromus Necromus | 1,900 |
| Water | 9 |  Neptilius Neptilius | 2,000 |  Jormuntide Jormuntide | 1,800 |
The other half is Partner Skills — 284 distinct ones across the roster, and 226 of them scale as you raise that Pal's rank. They are utilities, not attacks: Cattiva raises your carry weight from 100 to 200, Anubis adds 30% to 50% ranged attack, Nitewing and Beakon push your move speed. That's the closest Palworld gets to Aniimo's Twining, and it's genuinely a narrower idea — Twining hands you the creature's body, movement and perspective as the normal way to play, where a Partner Skill is a passive you slot. Browse them all on the partner skills list or the mount speed rankings.
Which One Should You Play?
Play Palworld if the sentence "my base makes its own ammo now" sounds appealing. The collecting is real — 288 Pals, 300 active skills, 312 passives — but the game's centre of gravity is a survival-crafting loop with a creature-powered factory bolted into it, plus open-world combat where you're holding the rifle. If you bounce off base management, you will bounce off Palworld, because that's most of the late game.
Play Pokemon if you want the turn-based team-building puzzle and a structured regional adventure, with Legends: Arceus as the closest thing to Palworld's field hunting and Legends: Z-A for real-time command battles. Play Aniimo if the appealing part is experiencing the world *as* a creature — Twining, Command and Twine modes, and a Homeland to make productive on the side. The useful question isn't which one has monsters in balls; it's what you want to be doing in the twenty minutes after a catch. If the answer is "fixing a production bottleneck", you want this one — start with what to do first and the interactive map, which has 40,924 pins across 75 layers including all 90 alphas.
Related Guides
Start here if you're coming from another monster-taming game:
- What to Do in Palworld: Your First Hours
- Game Mechanics Explained: Combat, Base, and Survival
- How to Catch Pals, All Sphere Tiers, and Capture Rate
- How Breeding Works: Combi Ranks, Unique Combos, and Inheritance
- Super Effective and Resistance Explained: Type Chart
- Best Base Pals: 7 Workers for Every Job
- Palworld Base Building Guide: All 7 Structure Sets and Costs
- Best Guns Tier List: All Guns Ranked
- Best Flying Mounts and the Full Saddle Upgrade Path
- Best Partner Skills and Their Effects
- Every Palworld guide · Palworld Interactive Map · Type Chart and Counters