Feybreak Location, How to Get There, and What's On It
Feybreak sits in the far southwest of the Palpagos map, and nothing gates it. Here is the exact location, the 724 m sea crossing that gets you there, all 24 fast travel statues with coordinates, the 19 Alphas waiting, the 17 Pals that spawn nowhere else, and what the island is worth farming.
Feybreak is the endgame island in the far southwest corner of the Palpagos map, and the single most common reason people never see it is that they assume something unlocks it. Nothing does. This guide gives you the exact location, the shortest water crossing, all 24 fast travel statues with coordinates, the 19 Alphas and 17 exclusive Pals living out there, and the materials that make the trip worth repeating.
Feybreak Location at a Glance
Feybreak is not a separate map or a menu you warp into — it is part of the same world as everything else, just far enough southwest that most players never fly past Mount Obsidian's coast to find it. The island runs about 4.3 km north to south and covers coordinates from roughly X -1456 to -608 and Y -1743 to -798, which puts its northeast tip within sight of the volcano region and its tower out at the very bottom-left of the world. Open the Palworld interactive map and drag to the southwest corner and you are looking at it.
| Detail | Value |
|---|---|
| Where it is | Far southwest corner of the Palpagos map, past Mount Obsidian's southwest shore |
| Coordinate span | X -1456 to -608, Y -1743 to -798 |
| Size | About 4.3 km north to south, 3.9 km east to west |
| Closest point to land | Scorched Ashland at -811, -829 |
| Shortest sea crossing | 724 m of open water from Mount Obsidian |
| Fast travel statues | 24 |
| Field threat band | Level 50 to 66 |
| Tower boss | 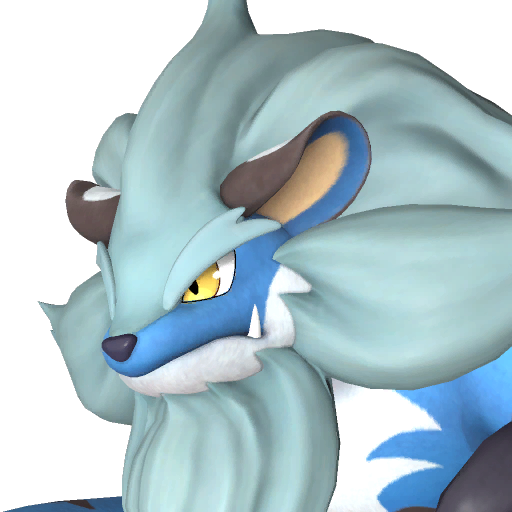 Bjorn & Bastigor, Level 60, Ice Bjorn & Bastigor, Level 60, Ice |
| Pals found nowhere else | 17 species |
| Signature material | 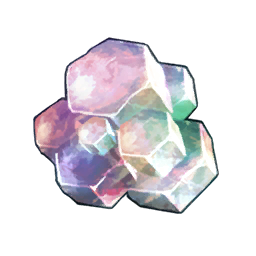 Hexolite Quartz — all 635 nodes in the game Hexolite Quartz — all 635 nodes in the game |
How to Get to Feybreak
There is no unlock quest, no key item and no boss you have to beat first. Feybreak is simply out there, and the only obstacle is water — the island has no statue you can warp to until you have physically stood on one, so the first trip has to be made under your own power. That makes a flying mount the whole answer, and the crossing is shorter than people expect once you pick the right launch point.
 Fly Southwest from Mount Obsidian
The narrowest gap between Palpagos proper and Feybreak is 724 m, from Mount Obsidian's southwest shore across to Scorched Ashland at -811, -829. That is the island's northeast corner and the correct place to make landfall, because the statue is right there and the surrounding ground is the tamest on the island. Any flying mount that can hold a straight line will make it — the table below is sorted by ride sprint speed, with the crossing time each one gives you.
| Mount | Sprint speed | Stamina | Saddle level | 724 m crossing |
|---|---|---|---|---|
| Jetragon | 3,300 | 110 | 79 | ~22 seconds |
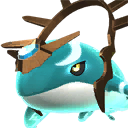 Panthalus Panthalus | 3,000 | 100 | No saddle needed | ~24 seconds |
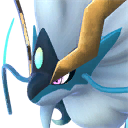 Shaolong Shaolong | 2,800 | 100 | 77 | ~26 seconds |
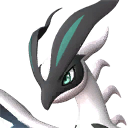 Eidrolon Eidrolon | 2,750 | 130 | 68 | ~26 seconds |
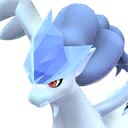 Frostallion Frostallion | 1,800 | 300 | 62 | ~40 seconds |
 Selyne Selyne | 1,600 | 300 | 53 | ~45 seconds |
Speed is the wrong thing to optimise for here. Jetragon is the fastest mount in the game but its saddle sits at technology level 79, far past the point where you would want Feybreak opened. Selyne is the realistic pick — a level 53 saddle and 300 stamina, which is nearly three times Jetragon's pool and the reason it crosses without ever dropping to a glide. Frostallion does the same job nine levels later and faster. If you have already beaten Panthalus, that mount needs no saddle at all, which makes it the cheapest way over the water by a distance.
Island-Hop the Southwest Islets
If your stamina pool is thin, break the trip into two shorter legs instead of one long one. Two of the small offshore islands sit between the mainland and Feybreak and both already have their own fast travel statues, so you can warp to the halfway point instead of flying it. Bicornis Islet is the best of them: from its statue, Feybreak's Amethyst Outcrop is only 623 m away, the shortest hop to the island from anywhere in the game. Sandstone Gate Islet gives you a 896 m run to Curved Redrock on Feybreak's east coast.
| Launch point | Lands you at | Feybreak coords | Distance |
|---|---|---|---|
| Bicornis Islet | Amethyst Outcrop | -1183, -1744 | 623 m |
| Sandstone Gate Islet | Curved Redrock | -1207, -835 | 896 m |
| Mount Obsidian southwest shore | Scorched Ashland | -811, -829 | 724 m |
Amethyst Outcrop is the shortest crossing but it drops you at the island's southern end, a stone's throw from the Feybreak Tower and the level 66 Alphas that patrol around it — great once you are geared, dangerous as a first landing. Scorched Ashland is the better opening move even though it is a hundred metres further, because the northeast corner is where the softest spawns are and where you can plant a base without immediately being found.
Light Every Statue Before You Do Anything Else
Once you land, the island stops being a problem forever — but only for the statues you have actually touched. Feybreak has 24 of them, more than any other single region, and a lap to activate them all converts the whole island into one warp away. Do that lap early, on a mount, before you start fighting anything. The coordinates below are sorted north to south, so you can run them as a route rather than criss-crossing.
| Fast travel statue | Coordinates |
|---|---|
| Scorched Ashland | -811, -829 |
| Curved Redrock | -1207, -835 |
| Hill Entrance | -996, -842 |
| Shield Dragon Tunnel | -970, -979 |
| Crimson Cliffs | -689, -991 |
| Stone Pillar Cave Entrance | -897, -1013 |
| Deserted Ash Plateau | -1399, -1019 |
| Scarlet Outlook | -1082, -1046 |
| Crystallized Great Tree | -946, -1136 |
| Crimson Labyrinth | -1157, -1152 |
| Emberstone Plateau | -719, -1196 |
| Hidden Passage to the Oculus Gate | -1047, -1254 |
| Scorched Hill | -1191, -1256 |
| Oilfield Overlook | -1342, -1289 |
| Wildlands Floodgate | -863, -1312 |
| The Oculus Gate, Tower in Sight | -1117, -1389 |
| Shady Mushroom Cliffs | -1306, -1412 |
| Loess Plains | -891, -1459 |
| Feybreak Shipwreck | -1388, -1473 |
| Silent Lake | -1202, -1498 |
| Azure Cliffs | -1111, -1618 |
| Exile's Cape | -1398, -1663 |
| Feybreak Tower Entrance | -1287, -1667 |
| Amethyst Outcrop | -1183, -1744 |
What Level You Need for Feybreak
The island does not check your level at the door, which is exactly why people die on it. The wild roster and the Feybreak Warrior camps run level 50 to 60, the Alphas sit at 60 to 66, and the tower boss is level 60 with a first-fight health multiplier of ×62 — the highest padding any tower boss in the game gets. You can land safely in the mid 40s if you stay on a mount and only collect statues. You cannot fight anything until the mid 50s.
| Gate | What you need | Why |
|---|---|---|
| Getting there at all | Any flying mount with a saddle | 724 m of water and no statue on the far side until you land |
| Surviving the statue lap | Level 45+, a mount you can stay on | Field Pals ignore you at altitude; ground contact is what kills |
| Fighting the open field | Level 55+ | Wild roster and Feybreak Warrior camps sit at 50 to 60 |
| Hunting the Alphas | Level 60+ | The 19 island Alphas run level 60 to 66 |
| Feybreak Tower | Level 60+ and a Fire team | Bastigor is Ice with a ×62 health multiplier |
The gap that catches people is between the third and fourth rows. Levelling from 55 to 60 on the island itself is slow because everything hits back, so the sane order is: land, take the statues, leave, level somewhere else, then come back for the Alphas. The Palworld endgame checklist covers what should already be done before Feybreak is worth your time.
 The 19 Alpha Bosses on Feybreak
Feybreak carries 19 field Alphas, more than a fifth of every Alpha in the game packed into one island, and they cluster in the level 60 to 66 band. Nine of them are subspecies you cannot farm anywhere else, which is what makes the island the fastest place to fill out the back half of a Paldeck. Coordinates below are the fixed spawn points — they respawn, so a full sweep is a repeatable route rather than a one-off.
| Alpha | Level | Coordinates |
|---|---|---|
| Faleris Aqua | 66 | -1305, -1623 |
 Azurmane Azurmane | 66 | -1131, -1670 |
 Loupmoon Cryst Loupmoon Cryst | 66 | -1146, -1416 |
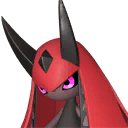 Splatterina Splatterina | 65 | -1078, -1458 |
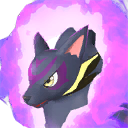 Kitsun Noct Kitsun Noct | 65 | -847, -1309 |
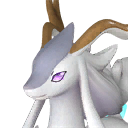 Celesdir Celesdir | 65 | -965, -1174 |
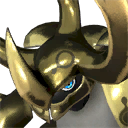 Warsect Terra Warsect Terra | 64 | -1018, -1238 |
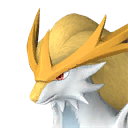 Gildane Gildane | 63 | -940, -1415 |
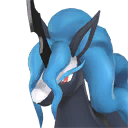 Starryon Starryon | 63 | -892, -1295 |
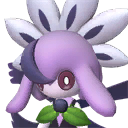 Prunelia Prunelia | 63 | -1355, -969 |
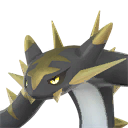 Cryolinx Terra Cryolinx Terra | 62 | -1285, -1304 |
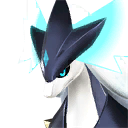 Silvegis Silvegis | 62 | -984, -1024 |
 Omascul Omascul | 60 | -707, -931 |
 Dazzi Noct Dazzi Noct | 60 | -1200, -856 |
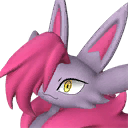 Nyafia Nyafia | 60 | -919, -919 |
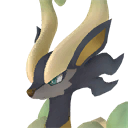 Fenglope Lux Fenglope Lux | 60 | -857, -1148 |
 Nitemary Nitemary | 60 | -923, -1015 |
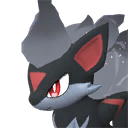 Smokie Smokie | 60 | -878, -1469 |
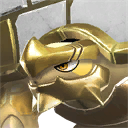 Tetroise Primo Tetroise Primo | 60 | -1081, -1322 |
Three of these are worth going out of your way for. Silvegis at -984, -1024 is the cheapest reliable Dragon on the island and its drops feed straight into late-game crafting. Warsect Terra is the rarest thing on the list and only has 58 spawn points across the whole island, so the fixed Alpha node is realistically the only place you will meet one. Tetroise Primo rounds out the set because it is also the easiest of the three to catch at level 60 — Neutral, slow, and it does not punish a bad throw.
Feybreak Tower: Bjorn and Bastigor
The island's tower sits at the far southwest, with its own fast travel statue at Feybreak Tower Entrance (-1287, -1667) and a second one, The Oculus Gate, Tower in Sight (-1117, -1389), that names exactly what you can see from it. Bjorn fights alongside Bastigor at level 60, an Ice pairing carrying a ×62 first-fight health multiplier, the highest of any tower boss in the game and more than double what Victor and Shadowbeak bring ten levels earlier. Fire is the answer and it is not close; bring a Fire team, Fire ammo and nothing that shares Bastigor's element. Clearing it completes the main-story objective *Bearer of All Burdens*.
The rematch is a different animal entirely — level 80, roughly 487,500 HP, and it only takes 18% of your damage. How to Beat Hard Mode Bjorn and Bastigor has the team, the ring, the full attack rotation and the 10% legendary schematic it pays out.
17 Pals That Spawn Only on Feybreak
51 species spawn somewhere on Feybreak and 17 of them appear nowhere else in the world. The island leans hard Dark — ten of the seventeen carry the element — which means one strong Dragon attacker covers most of what you will run into out there. Spot counts below are how many distinct spawn points each one has, and they tell you which of these are trivial pick-ups and which will take a real hunt.
| Pal | Element | Spawn points | How hard it is to find |
|---|---|---|---|
| Omascul | Dark | 1,621 | Everywhere — you will catch one by accident |
| Smokie | Dark | 1,620 | Everywhere, and it also headlines the cavern boss pool |
| Celesdir | Neutral | 1,613 | Everywhere; the breeding parent for two Primo variants |
| Splatterina | Dark | 769 | Common across the middle of the island |
| Prunelia | Grass / Dark | 638 | Common; the only dual Grass-Dark Pal out here |
| Gildane | Ground | 351 | Uncommon, worth a detour for the rarity |
| Kitsun Noct | Dark | 340 | Uncommon |
| Nyafia | Dark | 259 | Uncommon |
| Fenglope Lux | Electric | 258 | Uncommon |
| Starryon | Dark | 178 | Scarce |
| Cryolinx Terra | Ground | 156 | Scarce |
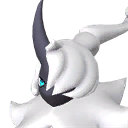 Felbat Felbat | Dark | 121 | Scarce |
| Azurmane | Electric | 112 | Scarce |
| Nitemary | Dark | 106 | Scarce |
| Warsect Terra | Ground | 58 | Rare — use the fixed Alpha node |
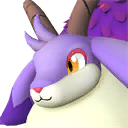 Caprity Noct Caprity Noct | Dark | 51 | Rare |
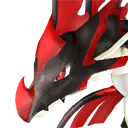 Jormuntide Ignis Jormuntide Ignis | Dragon / Fire | 21 | The rarest thing on the island |
Jormuntide Ignis is the one to plan around. Twenty-one spawn points on an island this size means you can fly for an hour and never see one, so flip its layer on with the spawn map for Jormuntide Ignis and go to the points rather than hoping. Celesdir is the opposite problem — it is impossible to avoid, and since it parents two Primo variants, catch a pair on your first lap and you have unlocked a chunk of breeding you would otherwise be chasing later.
What Feybreak Is Worth Farming
This is the real reason to open the island. Feybreak holds the densest loot on the map by a wide margin — 3,588 respawning caches, which is more than the Grasslands manage across a region several times its size, and it is the only place Hexolite Quartz exists at all. Every one of the 635 nodes in the game is here, which means the entire Hexolite armor line is gated behind reaching this island.
| What | Count on Feybreak | Share of the game's total |
|---|---|---|
| Hexolite Quartz nodes | 635 | All of them |
| Loot caches | 3,588 | The largest single-region pool in the game |
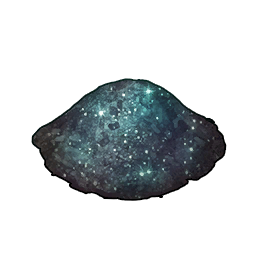 Nightstar Sand nodes Nightstar Sand nodes | 222 | 222 of 271 |
| Treasure chests | 177 on the island (201 roll its table) | Best late-region chest count |
| Grade 1 Pal egg nests | 496 | 496 of 1,168 |
| Grade 2 Pal egg nests | 70 | 70 of 446 |
| Oil fields | 60 | 60 of 185 |
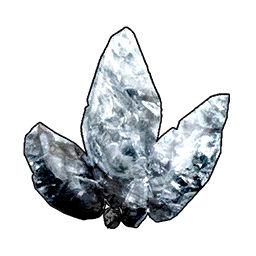 Pure Quartz nodes Pure Quartz nodes | 70 | 70 of 607 |
| Stat lotuses | 120 | 120 of 866 |
| Pal effigies | 45 | 45 of 360 |
| Skill fruit trees | 7 | 7 of 35 |
| Fishing spots | 48 (11 rare) | 48 of 367 |
| Elemental-sealed chests | 26 | 26 of 109 |
| Enemy camps | 11 (plus 2 sea base camps) | 11 of 48 |
| Journals | 5 | Bjorn's complete set |
Read that table as a routing decision rather than a brag. The caches and the quartz are why you come; the 496 grade 1 egg nests are why most people's egg farming route ends up on this island rather than in the Grasslands, since the variety here is late-game and the throughput is still enormous. The Hexolite Quartz layer and the Feybreak chest layer are the two worth switching on before your first proper farming lap.
 Feybreak Supply Drops
Supply drops that land on Feybreak roll the game's richest crate table. Every single crate carries 30 to 40 Chromite at 100%, which alone beats digging for it, and each one has a coin-flip chance at both Legendary Spheres and Ultimate Spheres in stacks of 5 to 10. The crate table is also the only place the Hexolite armor schematics come from as a random roll.
| Reward | Chance per crate | Amount |
|---|---|---|
| Chromite | 100% | 30-40 |
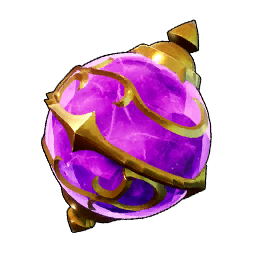 Legendary Sphere Legendary Sphere | 50% | 5-10 |
 Ultimate Sphere Ultimate Sphere | 50% | 5-10 |
| Grenade Launcher Schematic 1 | 23.74% | 1 |
| Stat elixirs (each of five kinds) | 20% | 2 |
| Hexolite Armor / Helmet Schematic 1 | 14.84% | 1 |
| Cold or Heat Resistant Hexolite Schematic 1 | 8.90% | 1 |
| Rocket Launcher Schematic 1 | 8.90% | 1 |
| Applied work handbooks (each of twelve) | 8.33% | 1 |
| Legendary Hexolite Armor Schematic 4 | 0.12% | 1 |
| Legendary Cold / Heat Resistant Schematic 4 | 0.07% | 1 |
The 8.33% handbook rate is the number most people miss. That is over a hundred times what a Grasslands crate pays for the same item, and it applies to all twelve work handbooks independently, so a Feybreak crate is genuinely the best handbook source in the game. The legendary schematics at the bottom are lottery tickets rather than a farm — the Heat Resistant Hexolite Armor schematic guide lays out the chest, salvage and dig routes that beat waiting on a 0.07% crate roll.
Dungeons and Sealed Realms on Feybreak
Feybreak has 30 cavern entrances scattered across it, all feeding the same dungeon: Feybreak Cavern, a corridor roster of level 50 to 56 Pals with an 18-boss pool at level 56 to 58. Thirty doors into one dungeon means you are never more than a short flight from a run, which is what makes it the most convenient repeatable content on the island. On top of that the island carries five named tunnels and four one-off Sealed Realms.
| Type | Names | What to expect |
|---|---|---|
| Cavern entrances | 30 doors, all into Feybreak Cavern | Level 50-56 roster, 18-boss pool at 56-58, Ultimate Sphere chest loot |
| Named tunnels | Cannibal's Tunnel · Shield Dragon Tunnel · Crystalized Tunnel · Dark Flame Tunnel · Bloodstained Tunnel | Fixed underground routes; Shield Dragon Tunnel has its own statue |
| Sealed Realms | Wardenstone · Little Hero · Indigo · Soul | One-off shrines, each guarding a fixed boss — clear once and done |
The cavern is the one to prioritise. Its boss pool is stacked with subspecies that are painful to hunt in the open field — Faleris Aqua, Loupmoon Cryst and Tarantriss all show up there — and the roster tilts heavily Dark, so one Dragon attacker carries most of a run. The Feybreak Cavern guide has the full spawn list, boss pool and chest table. The four Sealed Realms are the opposite: worth exactly one visit each, then never again.
Summary
Feybreak is the far southwest corner of the Palpagos map, spanning X -1456 to -608 and Y -1743 to -798. Nothing unlocks it — fly 724 m southwest from Mount Obsidian's shore and land at Scorched Ashland, or hop 623 m from Bicornis Islet's statue if your stamina is short. Light all 24 statues on your first trip, come back at level 55+ to fight, and at level 60+ for the 19 Alphas and the Ice tower pairing at the bottom of the island. It pays you back in Hexolite Quartz, 3,588 caches and 17 Pals that exist nowhere else.
Related Guides
Hubs
Feybreak content