How to Beat Bellanoir Raid Boss: Weakness, Team, and Drops
Bellanoir summons at Level 35 with ×120 HP and ×1.5 damage, but she is the one raid that never reduces the damage you deal. Here's the element she folds to, the Dragon squad that shortens the fight, all six of her Dark attacks with power and cooldown, where her slab fragments come from, and every reward the kill pays out.

Bellanoir is the Level 35 Dark raid boss you call down at a Summoning Altar, and she is the gentlest of the five raids by a wide margin — ×120 HP and ×1.5 damage, but no damage reduction at all, which no other raid boss can say. This guide covers the one element that gets bonus damage on her, the squad that ends the fight fastest, all six attacks in her rotation with power and cooldown, where the slab fragments come from, and everything the clear pays out.
 Bellanoir Raid Stats and Weakness
The whole difficulty of this fight sits in one row of the table below: damage taken ×1.0. Every other raid shaves your output — Bellanoir Libero eats 60% of it, Xenolord 65% — while Bellanoir takes every point you land at face value. Her health bar is the smallest multiplier of any raid too, and ×1.5 damage means she hurts without one-shotting a levelled Pal. If you have never done a raid, this is the one to open with. All five multipliers sit side by side on the raid boss list with every battle multiplier.
| Standard Bellanoir Raid | |
|---|---|
| Boss | Bellanoir |
| Element | Dark |
| Weak to | Dragon — the only element with a bonus against Dark |
| Summon level | 35 |
| HP multiplier | ×120 — the lowest of any raid boss |
| Damage it deals | ×1.5 — the lowest of any raid boss |
| Damage it takes | ×1.0 — no reduction, unique among raids |
| Cooldown rate | ×2 — the same rate every raid uses |
| Mode change | None — she never swaps element mid-fight |
| Paldeck | #195 |
| Summon cost |  Bellanoir's Slab, built from 4× Bellanoir's Slab, built from 4× 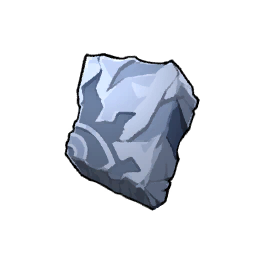 Bellanoir's Slab Fragment Bellanoir's Slab Fragment |
| Guaranteed body drops | 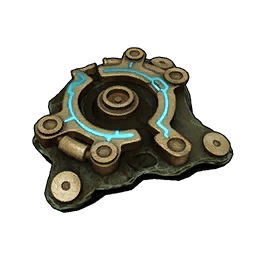 Ancient Civilization Parts ×4–6, Ancient Civilization Parts ×4–6, 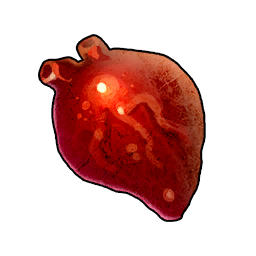 Precious Entrails ×2–3, Precious Entrails ×2–3, 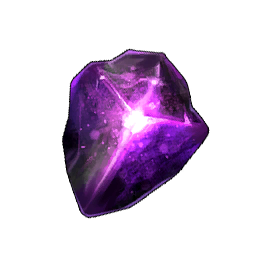 Dark Fragment ×2–3 Dark Fragment ×2–3 |
What You Need Before You Summon Her
The slab is consumed the moment you offer it, win or lose, so treat this as a gate. The altar itself is early and cheap — Technology 33, and there are 16 altars already standing out in the world if you would rather not build one, all pinned on the interactive map's raid altar layer. Gear is the real requirement. You can technically show up at Technology 33 with a Handgun, but the fight gets short around Technology 45–46, where the Assault Rifle and Pal Metal Armor land. Every one of her attacks is Dark, so a Ring of Dark Resistance is the single best accessory slot you can fill for this one.
| Requirement | What it costs |
|---|---|
 Summoning Altar Summoning Altar | Technology 33 — 100 Stone and 20 Paldium Fragment |
| Bellanoir's Slab | 4× Bellanoir's Slab Fragment — see the sources below |
| A Dragon attacker | Any Pal from the team table, condensed and levelled past 35 |
 Pal Metal Armor Pal Metal Armor | Technology 46 — the comfortable armour tier for this fight |
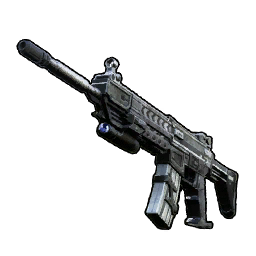 Assault Rifle Assault Rifle | Technology 45 — sustained damage beats burst here |
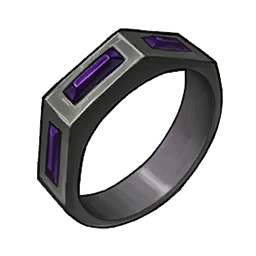 Ring of Dark Resistance Ring of Dark Resistance | Cuts the only damage type in her entire kit |
How to Get Bellanoir's Slab
Four Bellanoir's Slab Fragments combine into one slab. Fragments come from two directions: chests and camp stashes you loot yourself, and Pal Expeditions you dispatch and forget. Expeditions are the low-effort route — two of the three that pay fragments are Normal difficulty and take 45 minutes, so a rotation of dispatches builds slabs while you play. If you would rather farm it actively, Desert chests have the best odds per roll at roughly two in three, and the Desert alone holds 263 chest pins; open the Desert treasure chest layer and run the dense clusters. Camp stashes in the 48 enemy camps are worth clearing on the way past.
| Source | Type | Chance per roll | Fragments |
|---|---|---|---|
| Blazing Cavern | Expedition — Normal, 45 min | Reward table | 1–2 |
| Hidden Sanctum of the Desert | Expedition — Normal, 45 min | Reward table | 1–2 |
| Rayne Syndicate Smuggling Warehouse | Expedition — Very Hard, 120 min | Reward table | 1–2 |
| Chests in the Desert | Treasure chest | ≈67% | 1 |
| Chests in Mount Obsidian | Treasure chest | ≈60% | 1 |
| Enemy camp stashes in Mount Obsidian | Camp boss stash | ≈60% | 1 |
| Chests in the Forest | Treasure chest | ≈50% | 1 |
| Enemy camp stashes in the Desert | Camp boss stash | ≈23% | 1 |
 Why Dragon Is the Answer
Dark has exactly one counter on the element chart and counter finder — Dragon — and it is worth about 1.5× damage. Stacked on top of Bellanoir's ×1.0 damage taken, a Dragon squad is doing full super-effective damage to a raid boss, which is a sentence you cannot write about any other raid in the game. The matchup is also clean defensively. Dragon is beaten by Ice, and base Bellanoir has no mode change — she never picks up a second element, unlike her Libero form, which shifts to Ice partway through and freezes the arena. Your Dragons are safe for the entire fight. The typing you should bench is Neutral, since Dark's own bonus lands on Neutral Pals and every attack she owns is Dark.
| Matchup | Result |
|---|---|
| Dragon attacking Bellanoir | Bonus damage — the only element that gets it |
| Her Dark attacks vs your Dragon Pals | Flat damage — Dragon's weakness is Ice, which she does not have |
| Her Dark attacks vs a Neutral Pal | Bonus damage — the one typing to leave at base |
| Ice Pals in your party | Flat both ways, but they lose the Dragon damage bonus |
Compared to  Bellanoir Libero Bellanoir Libero | Libero gains Ice mid-fight and punishes Dragons; base Bellanoir never does |
 Best Pals to Bring Against Bellanoir
Jormuntide Ignis is the pick if you have it — 150 melee attack is the highest of any Dragon Pal outside a raid boss, and its Fire half changes nothing about this matchup. For ranged damage, Jetragon leads at 140, though it is a Level 70 alpha and most players fighting Bellanoir will not have caught it yet. The realistic answer at this stage is Quivern: only 100 attack, but 423 spawn points across the map, more than every other Dragon on this list combined, so you can go get one right now and condense it. Shaolong is the best middle option at 135 ranged attack, 140 HP and 63 spawn points, and Astegon is a Level 55 alpha you can walk up to with 125 defense to match its attack.
| Pal | Attack (M / R) | HP / Def | Why bring it |
|---|---|---|---|
| Jormuntide Ignis | 150 / 130 | 130 / 100 | Highest melee attack of any catchable Dragon — best raw damage per hit |
| Jetragon | 100 / 140 | 115 / 120 | Highest ranged attack in the element; a Level 70 alpha, so it is a stretch goal |
 Shaolong Shaolong | 100 / 135 | 140 / 120 | Best attack-to-bulk balance, and 63 spawn points make it findable |
 Orserk Orserk | 100 / 130 | 120 / 115 | 130 ranged across 33 spawn points — a solid second Dragon slot |
 Astegon Astegon | 100 / 125 | 100 / 125 | Level 55 alpha with 125 defense; survives the beam barrage better than most |
 Aegidron Aegidron | 100 / 125 | 105 / 140 | Highest defense of any Dragon at 140 — the one that stays alive |
 Quivern Quivern | 100 / 100 | 105 / 100 | 423 spawn points, by far the easiest Dragon to get — the accessible pick |
 Blazamut Ryu Blazamut Ryu | 150 / 130 | 105 / 125 | Raid-tier stats, but you need to clear its own raid first |
Bellanoir's Attacks and What to Do
Every move she throws is Dark, and almost all of them apply Blind, which is the real annoyance in this fight — your screen goes dark while a 5,000-range homing attack is already in the air. Nightmare Ray is the one to respect: her exclusive skill, 600 power, and she vanishes before reappearing to fire a barrage of beams, so the moment she disappears you should already be moving. Note the cooldown column is her baseline; the raid's ×2 cooldown rate means she cycles through this list roughly twice as fast as the numbers suggest. Dark Cannon and Umbral Surge are the filler she spams between the heavy hitters, and Spirit Flame is the only one that leaves a status other than Blind.
| Move | Power | Cooldown | Effect | What it does |
|---|---|---|---|---|
| Nightmare Ray | 600 | 30s | — | Her exclusive skill: disappears, reappears, fires a barrage of beams |
| Nightmare Ball | 300 | 16s | Blind | Hurls a giant ball of darkness from long range |
| Spirit Flame | 200 | 12s | Burn | Three balls of malice that chase you until they connect |
| Dark Arrow | 120 | 8s | Blind | Homing dark energy — no dodging it, only outranging it |
| Dark Cannon | 70 | 4s | Blind | Fast filler energy ball, fired constantly |
| Umbral Surge | 60 | 4s | Blind | Fan of high-speed orbs that spreads with distance — close in to thread it |
Split up and keep the beams off your Pals
Umbral Surge fires a spreading fan, which means the further back you stand the wider the cone and the more of your party it clips. Grouping up in front of her at long range is the worst possible position. Fight from the flanks, keep your Pals and your co-op partners on different sides of her, and use the vanish animation on Nightmare Ray as your cue to break the line she was facing.
Burn the damage window instead of playing safe
Because she has no damage reduction, every second you spend not attacking costs you more than it would in any other raid. A Dragon partner landing super-effective hits plus sustained rifle fire clears her ×120 health bar far faster than a cautious hit-and-run pattern. Take the Blind, keep shooting in the direction she was last standing, and heal through the ×1.5 damage rather than disengaging from it.
Bring a second Pal for the Blind windows
Blind stacks on five of her six moves, and while you cannot see, your Pal can. A bulky Dragon like Aegidron at 140 defense holds her attention through those windows without dying, which is worth more than squeezing an extra 15 attack out of a squishier partner. Swap to your damage Pal once the status wears off.
 Bellanoir Raid Rewards
Everything on the clear list is a 100% drop — no rolling for it. The headline is Dark Skill Fruit: Apocalypse, a 400-power Dark move with a 20-second cooldown that you can graft onto any Dark Pal; more Dark options are covered on the Dark skill fruit guide. Three to five Training Manual (XL) is the quiet prize, since that is the fastest way to push a raid team past level 40. You also pick one of three Applied Handbooks, each of which permanently adds a work suitability to a Pal — the handbook guide covers which Pals are worth spending them on. On top of that, the raid leaves an egg: nine times out of ten it hatches a standard Bellanoir, and the other one in ten is the boss-sized version.
| Reward | Amount | Chance |
|---|---|---|
| Dark Skill Fruit: Apocalypse | ×1 | 100% |
 Ancient Civilization Core Ancient Civilization Core | ×1–3 | 100% |
 Training Manual (XL) Training Manual (XL) | ×3–5 | 100% |
 Applied Ranching Handbook I Applied Ranching Handbook I | ×1 | Choose one of three |
 Applied Transporting Handbook I Applied Transporting Handbook I | ×1 | Choose one of three |
 Applied Medicine Production Handbook I Applied Medicine Production Handbook I | ×1 | Choose one of three |
| Ancient Civilization Parts | ×4–6 | 100% body drop |
| Precious Entrails | ×2–3 | 100% body drop |
| Dark Fragment | ×2–3 | 100% body drop |
Bellanoir After the Kill
Bellanoir does not spawn anywhere in the world, so the raid is the only way to get one. She is worth keeping for the base, not just the Paldeck entry: Handiwork 5 and Medicine Production 5 are both top-tier ratings, with Transporting 4 on top, which makes her one of the better all-round workers you can own at this point in the game. In combat she runs 150 ranged attack on a 120 HP frame with the Nightmare Iris partner skill. She is nocturnal and attacks on sight, so expect her to work the night shift at your base. Once you have two, the breeding calculator confirms the only pairs that produce her are Bellanoir × Bellanoir and Bellanoir × Bellanoir Libero.
Related Guides
- All raid bosses and their battle multipliers
- Bellanoir Libero: slab locations and the Ice shift
- How to beat Hartalis raid boss
- How to get Blazamut Ryu: slab locations and raid fight
- How to get Xenolord: slab locations and raid fight
- Pal Expeditions and every reward table
- Every cavern and what it drops
- Element type chart and counter finder
- All Dark skill fruits and who can learn them
- Every Palworld guide on the site